


Robert Lemke launched the Neos project in 2006. Then a group of software engineers joined in to get a look at how to manage and edit content. The Neos project became independent in 2015. The open-source nature of Neos software helps it to become better quality software. The establishment of the Neos Foundation Community Interest Company (CIC) by the Neos team in 2017 allows you to take control of your affairs with the least amount of administrative bureaucracy. Here we concentrate on teaching you about Tutorial Configure Neos CMS on Ubuntu 18.04 step by step.
Neos CMS is an open-source content management system designed for building and managing websites and web applications. Neos CMS is known for its flexibility and user-friendliness, making it a popular choice for developers and content creators looking to create dynamic and customizable websites.
This CMS platform has many features that are useful for content editors and creators, and customization by designers and developers without any hassle. Stay with us until the end of this article to get more information about it. Also, if you want to use this CMS, you can benefit from our Linux VPS servers.
Neos CMS installation prerequisites include:
– Run Ubuntu Server 18.04
– Create a Sudo user and set the root password
Before doing any action, update your system by executing the following command:
apt-get update -y
apt-get upgrade -y
You must restart your server to apply the changes after the update is complete.
First, you can install the required Apache web server, PHP database server, MariaDB, and other required packages by entering the following commands:
apt-get install apache2 mariadb-server php7.2 libapache2-mod-php7.2 php7.2-common php7.2-mysql php7.2-gmp php7.2-curl php7.2-intl php7.2-mbstring php7.2-xmlrpc php7.2-gd php7.2-bcmath php7.2-xml php7.2-cli php7.2-zip curl unzip git -y
You should start Apache and enable it to start on boot by entering the following command:
systemctl start apache2
systemctl enable apache2
Also, you should start the MariaDB service and enable it to start on boot by running the following command:
systemctl start mariadb
systemctl enable mariadb
Now change the php.ini file as the following command:
nano /etc/php/7.2/apache2/php.ini
In this step, you must do the following to change the following lines:
short_open_tag = On
memory_limit = 256M
upload_max_filesize = 150M
max_execution_time = 360
date.timezone = Your_Desired_Timezone
Finally, you must save the file and then close it.
To configure the MariaDB database, first, you must secure it by running the following command:
mysql_secure_installation
Now you have to answer the questions in the command:
Enter current password for root (enter for none):
Set root password? [Y/n]: N
Remove anonymous users? [Y/n]: Y
Disallow root login remotely? [Y/n]: Y
Remove test database and access to it? [Y/n]: Y
Reload privilege tables now? [Y/n]: Y
Run the following command to log in to the MariaDB shell:
mysql -u root -p
By entering the following command you create a database and user for Neos:
MariaDB [(none)]> CREATE DATABASE neosdb;
MariaDB [(none)]> CREATE USER 'neos'@'localhost' IDENTIFIED BY 'mypassword';
Be sure to replace your password with the word “mypassword” in the previous and next commands. Then enter the following command to grant all privileges to the Neos database:
MariaDB [(none)]> GRANT ALL PRIVILEGES ON neosdb.* TO 'neos'@'localhost' IDENTIFIED BY 'mypassword' WITH GRANT OPTION;
You can change the character set of your database to utf8 with the following command:
MariaDB [(none)]> ALTER DATABASE neosdb charset=utf8;
In this step, You must flush the privileges. You can do this by entering the following command:
MariaDB [(none)]> FLUSH PRIVILEGES;
To exit the MariaDB shell, just enter the following command:
MariaDB [(none)]> EXIT;
Now run the following command to change the default MariaDB configuration file:
nano /etc/myql/mariadb.conf.d/50-server.cnf
In this step, you must add the following lines to make changes in the file:
innodb_file_format = Barracuda
innodb_large_prefix = 1
innodb_file_per_table = 1
innodb_default_row_format = dynamic
Remember to save the file before closing it. Restart the MariaDB service by entering the following command:
systemctl restart mariadb
Just run the following command to check the status of the MariaDB server:
systemctl status mariadb
Before installing Neos, you must first install Composer by entering the following command:
curl -sS https://getcomposer.org/installer | php
sudo mv composer.phar /usr/local/bin/composer
Use the following command to change the directory to Apache Webroot:
cd /var/www/html/
Enter the following command to install Neos CMS:
composer create-project --no-dev neos/neos-base-distribution neoscms
You can change the Neos CMS permission by running the following command:
chown -R www-data:www-data /var/www/html/neoscms/
chmod -R 755 /var/www/html/neoscms/
To configure Apache for NeosCMS First, you should create an Apache virtual host file for Neos by entering the following command:
nano /etc/apache2/sites-available/neoscms.conf
Now you need to add the following lines:
<VirtualHost *:80>
ServerAdmin [email protected]
DocumentRoot /var/www/html/neoscms/Web
ServerName example.com
<Directory /var/www/html/neoscms/Web/>
Options FollowSymlinks
AllowOverride All
Require all granted
</Directory>

ErrorLog ${APACHE_LOG_DIR}/neos_error.log
CustomLog ${APACHE_LOG_DIR}/neos_access.log combined

<Directory /var/www/html/neoscms/Web/>
RewriteEngine on
RewriteBase /
RewriteCond %{REQUEST_FILENAME} !-f
RewriteRule ^(.*) index.php [PT,L]
</Directory>
</VirtualHost>
Save and close the file as usual. Now you must enable the Neos virtual host by entering the following command:
a2ensite neoscms.conf
Enter the following command to enable the Apache rewrite module:
a2enmod rewrite
Finally, you need to restart the Apache service with the following command to apply the changes:
systemctl restart apache2
To check the status of Apache, run the following command:
systemctl status apache2
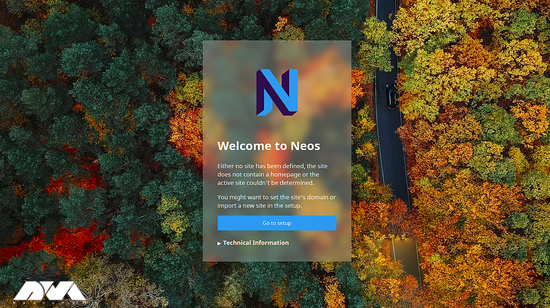
You must first type the URL http://example.com/setup in your web browser and you will see the following page:
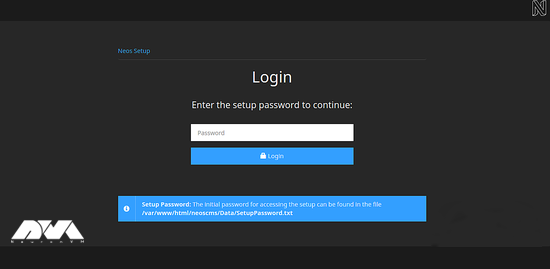
Then you need to find your password from the /var/www/html/neoscms/Data/SetupPassword.txt file and after entering it, click on Login. The following page will open:
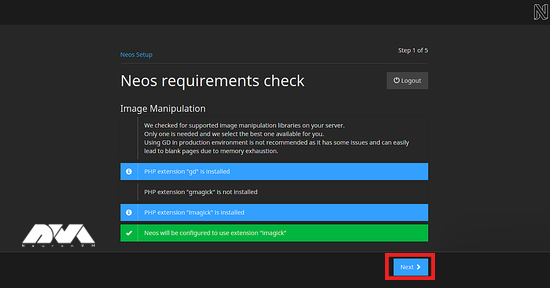
Now you need to click Next after confirming that you have installed all the required packages:
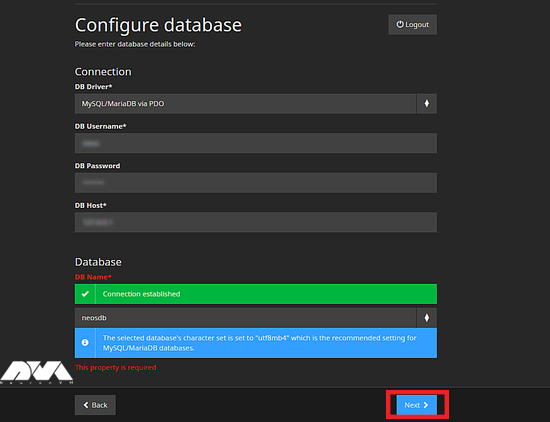
On the following page, after entering your database name, database username, and password, click Next:

In this step, after providing your administrator account details, click Next:
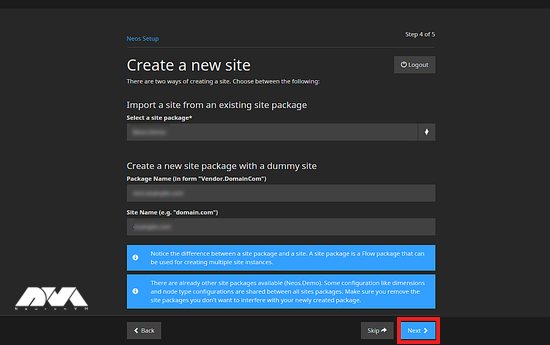
Click Skip. If the installation is successful, the following page will open:
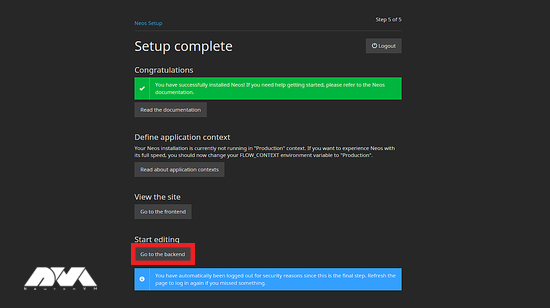
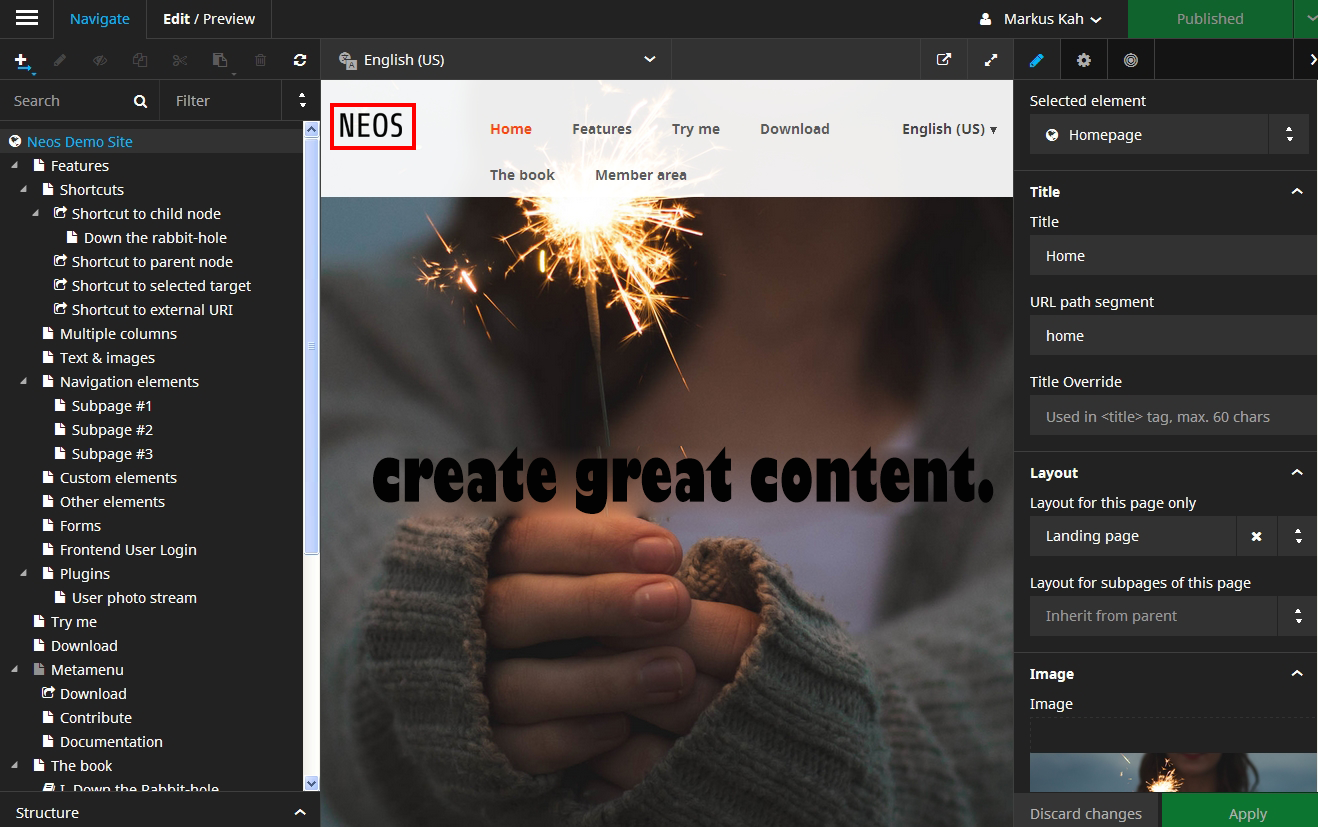
Now you should click “Go to the backend“.
Enter your username and password and finally click on Login.
Here are some issues about Neos CMS and their solutions:
1- You may encounter issues during the installation or setup of Neos CMS.
Solution:
Make sure to follow the official installation instructions provided in the Neos documentation. Double-check your system requirements, PHP version, and database setup. Pay close attention to any error messages and consult the Neos community or forums for assistance.
2- Neos may not have the required permissions to write to certain directories, which can cause issues with content publishing or asset uploads.
Solution:
Ensure that the web server user (usually www-data) has the necessary permissions on Neos directories. You can use chown and chmod commands to adjust permissions as needed.
3- Neos CMS might run slowly or be unresponsive.
Solution:
Optimize your server’s performance by configuring the web server, PHP, and database settings appropriately. Use caching mechanisms to speed up content delivery.
We introduce Neos CMS and briefly mention its history. Then you learned how to install and configure Neos CMS on Ubuntu 18.04. With Neos you can easily host your own website and start creating and managing your website’s content. If you have any questions or ideas, please share by leaving a comment under this post.
 Tags
Tags


Decompiling APK files on Ubuntu can be useful if you want to reverse-engineer or analyze Android app...


 Tags
Tags
Apache Web Server is a modular web server that can have flexibility, power, and high performance on ...
Tags


